Welcome to a holiday treat that’s sure to become a new family tradition! This festive Little Debbie Christmas Tree Cheesecake brings together the nostalgic joy of classic snack cakes with the rich, creamy texture of a homemade cheesecake. Originally introduced in 1985, the iconic Little Debbie Christmas Tree Cakes have been a festive staple for decades. Perfect for holiday gatherings, potlucks, or a cozy evening by the fire, this dessert is designed to impress. Get ready for a show-stopping dessert with its fun design and irresistible flavor that everyone will adore.
Why You’ll Love This Little Debbie Christmas Tree Cheesecake
This dessert offers a unique blend of comfort and elegance, making it a holiday favorite.
- It’s an easy yet impressive treat that’s perfect for the festive season.
- Features beloved Little Debbie Christmas Tree Cakes, adding a fun, nostalgic touch.
- You’ll enjoy a creamy, dreamy cheesecake texture that melts in your mouth.
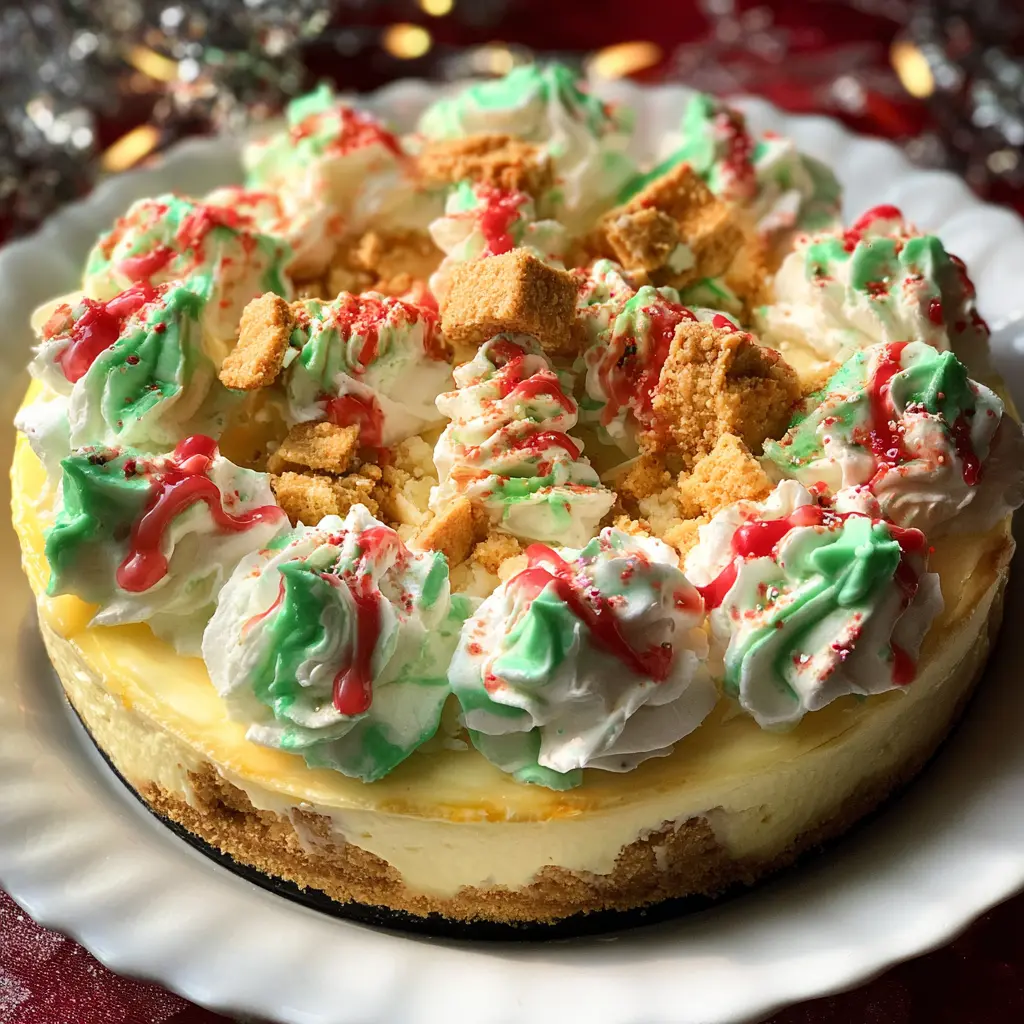
- The cheesecake is visually stunning and festively decorated, a true showstopper.
- It’s ideal for any Christmas celebration or holiday dessert table.
- Our simple, step-by-step instructions make baking this cheesecake achievable for anyone.
Ingredients
Gather these simple ingredients to create your spectacular Little Debbie Christmas Tree Cheesecake:
- For the Crust:
- 1 ½ cups Golden Oreos (about 18 Oreos), crushed
- 4 tablespoons unsalted butter, melted
- 1 tablespoon Christmas nonpareils
- For the Cheesecake:
- 28 ounces (3 ½ 8-ounce blocks) full-fat cream cheese, softened
- ¾ cup granulated sugar
- 10 Little Debbie Christmas Tree Cakes, divided
- 3 tablespoons all-purpose flour
- 1 teaspoon vanilla extract
- 4 large eggs
- ½ cup full-fat sour cream
- ¼ cup heavy whipping cream
- For the Ganache Topping:
- 4 ounces white baking chocolate, chopped
- ¼ cup heavy whipping cream
- ½ to 1 tablespoon green sanding sugar
- Red store-bought cookie frosting
- For the Whipped Cream:
- 1 cup heavy whipping cream
- 3 tablespoons powdered sugar
Notes & Substitutions
You can easily adjust a few ingredients to suit your taste or what you have on hand.
- Golden Oreos: Feel free to substitute with vanilla wafers, graham crackers, or shortbread cookies.
- Little Debbie Cakes: Use Chocolate Christmas Tree Cakes or even Zebra Cakes for a different twist.
- Sour Cream: Full-fat Greek yogurt is a great alternative if you don’t have sour cream.
- White Baking Chocolate: White chocolate chips work well in place of a baking bar.
- Nonpareils/Sanding Sugar: These are optional; use any festive sprinkles you prefer.
- Red Frosting: Homemade red frosting or ganache offers a custom touch.
- Butter: Salted butter is perfectly fine if unsalted isn’t available.
- Cream Cheese: Always ensure your cream cheese is at room temperature for a smooth batter.
- Eggs: Use large eggs for consistent results in this cheesecake recipe.


Festive Little Debbie Christmas Tree Cheesecake
Equipment
- Springform Pan
- Mixing Bowl
- Electric Mixer
Ingredients
Crust
- 6 Little Debbie Christmas Tree Cakes crushed
- 2 tbsp butter melted
Filling
- 16 oz cream cheese softened
- 1/2 cup granulated sugar
- 1 tsp vanilla extract
- 1 cup whipped topping like Cool Whip
- 2 Little Debbie Christmas Tree Cakes chopped, for folding in
Instructions
- In a bowl, mix crushed Christmas Tree Cakes with melted butter. Press into a springform pan to form the crust. Chill while making the filling.
- Beat cream cheese, sugar, and vanilla until smooth. Fold in whipped topping and chopped cakes.
- Spoon filling onto crust, spreading evenly. Chill for at least 4 hours or until firm.
- Top with additional whipped topping, sprinkles, or cake pieces if desired. Slice and serve chilled.
Notes
Nutrition
Equipment
Having the right tools makes baking this festive cheesecake a breeze.
- Hand mixer (or stand mixer)
- 9-inch springform pan
- Parchment paper (pre-cut strips are useful)
- Cheesecake water bath pan (larger than springform)
- Food processor
- Large mixing bowls
- Silicone spatula
- Piping tip (like Wilton 1M for stars)
- Piping bags (disposable are convenient)
- Angled spatula
Instructions
Follow these simple steps to create your show-stopping Little Debbie Christmas Tree Cheesecake.
Making the Golden Oreo Crust
Start by preparing a flavorful and festive base for your cheesecake.
- Preheat your oven to 350°F (175°C).
- Lightly spray the 9-inch springform pan with nonstick spray. Line the bottom with a parchment paper circle.
- Add Golden Oreos to a food processor and pulse until they form fine crumbs.
- Pour in the melted butter and Christmas nonpareils; pulse until just combined.
- Press the crumb mixture firmly and evenly into the bottom of the prepared springform pan.
- Refrigerate the crust for at least 15 minutes while you prepare the cheesecake batter.
Crafting the Christmas Tree Cheesecake
Now for the creamy, delicious filling featuring those iconic cakes.
- Beat the softened cream cheese in a large mixing bowl with a hand mixer until it is completely smooth and free of lumps.
- Add the granulated sugar and all-purpose flour to the cream cheese. Beat until just combined.
- Chop 4 of the Little Debbie Christmas Tree Cakes into small pieces. Add them to the batter and beat briefly.
- Scrape down the sides of the bowl with a silicone spatula. Mix again until the cake pieces are mostly incorporated; small chunks are fine.
- Beat in the vanilla extract until fully combined.
- Add the large eggs one at a time, mixing on low speed just until each egg is incorporated. Do not overmix.
- Finally, gently stir in the full-fat sour cream and heavy whipping cream until the batter is smooth.
- Wrap the outside of the springform pan tightly with heavy-duty aluminum foil to prevent water from entering during the water bath.
- Pour half of the cheesecake batter evenly over the chilled Oreo crust.
- Carefully arrange the remaining 6 whole Little Debbie Christmas Tree Cakes on top of the batter, spacing them out slightly.
- Gently spoon the remaining cheesecake batter over the whole cakes, ensuring they are completely covered.
- Tap the pan gently on the counter a few times to release any trapped air bubbles from the batter.
- Place the foil-wrapped springform pan into a larger roasting pan. Fill the larger pan with about 1 inch of warm water, creating a water bath.
- Carefully transfer the water bath setup to your preheated oven. Bake for 50-60 minutes, or until the edges are set and the center slightly jiggles when gently moved.
- Turn off the oven, leave the door slightly ajar, and let the cheesecake cool slowly in the oven for 1 hour.
- Remove from the water bath, unwrap the foil, and let it cool completely on a wire rack at room temperature.
Preparing the Ganache Topping
Add a vibrant, festive finish to your chilled cheesecake.
- Place the chopped white baking chocolate in a microwave-safe bowl. Heat the heavy cream in a separate microwave-safe bowl until simmering.
- Pour the hot cream over the chopped white chocolate. Let sit for 2-3 minutes, then stir until completely melted and smooth.
- Refrigerate the ganache, stirring every 10 minutes, for about 40 minutes total, until it thickens to a spreadable consistency.
- Once the cheesecake is completely cool, spread the cooled ganache evenly over the top.
- Sprinkle the green sanding sugar over the ganache, creating a vibrant base for the tree design.
- Using red store-bought cookie frosting, pipe wavy lines in a Christmas tree pattern across the top of the cheesecake.
- Chill the decorated cheesecake overnight in the refrigerator for the best setting and flavor.
Whipped Cream Finishing Touch
Just before serving, add a final flourish of creamy whipped topping.
- In a clean, cold mixing bowl, combine the cold heavy whipping cream and powdered sugar.
- Beat with a hand mixer on high speed until stiff peaks form, indicating a firm whipped cream.
- Transfer the whipped cream to a piping bag fitted with your desired piping tip (like a star tip).
- Pipe decorative swirls or dollops along the edges of the cheesecake for an elegant presentation.
Pro Tips & Troubleshooting
Ensure your cheesecake turns out perfectly every time with these helpful hints.
- Room Temperature Ingredients: Always use room temperature cream cheese, eggs, and sour cream for a smooth, lump-free batter. Using ingredients at room temperature is crucial for ensuring a silky, lump-free batter, which is vital for the cheesecake’s final texture.
- Do Not Overmix: Overmixing after adding eggs can incorporate too much air, leading to cracks in your cheesecake.
- A water bath provides gentle, even heat, preventing the cheesecake from cracking and ensuring a creamy texture.
- Cool Slowly: Allowing the cheesecake to cool gradually in the oven prevents drastic temperature changes that can cause cracks.
- Tap the Pan: Tapping the springform pan helps release air bubbles, resulting in a denser, smoother cheesecake.
- Ganache Consistency: Regularly stirring the ganache as it chills ensures it reaches the perfect spreadable consistency.
- Layering Cakes: Spoon the batter carefully over the whole cakes to keep them centered and fully submerged.
Serving Suggestions & Variations
This festive dessert is wonderful on its own, but a few additions can make it even more special.
- Serve each slice of chilled Little Debbie Christmas Tree Cheesecake with an extra dollop of fresh whipped cream.
- Decorate individual servings with additional holiday sprinkles, crushed candy canes, or a sprig of fresh mint.
- For a different flavor profile, try making this cheesecake with Little Debbie Chocolate Christmas Tree Cakes.
- Experiment with other Little Debbie snack cakes like Fudge Rounds or Nutty Buddy bars for future cheesecakes.
- Pair a slice of this rich cheesecake with a warm mug of hot chocolate or a freshly brewed cup of coffee.
Nutrition Information
This Little Debbie Christmas Tree Cheesecake is a decadent treat. Enjoy it in moderation as part of your holiday celebrations.
| Nutrient | Amount (Estimated per serving) |
|---|---|
| Calories | 620 kcal |
| Total Fat | 45g |
| Saturated Fat | 28g |
| Cholesterol | 180mg |
| Sodium | 320mg |
| Total Carbs | 48g |
| Sugars | 35g |
| Protein | 9g |
Disclaimer: Nutrition facts are an estimate and not guaranteed to be accurate. Please see a registered dietitian for special diet advice.
Conclusion
This holiday season, bring a smile to everyone’s face with this unique and incredibly festive Little Debbie Christmas Tree Cheesecake. Combining the nostalgic charm of everyone’s favorite Christmas snack cakes with the luxurious creaminess of a classic cheesecake, it’s truly a holiday masterpiece. Its delicious taste and festive appeal make it the ideal dessert for any celebration. We encourage you to try this show-stopping dessert and share the joy! Let us know how it turned out and spread the holiday cheer.
FAQ
Got questions about making this delightful cheesecake? We have answers!
Can Little Debbie Christmas Tree Cakes be frozen in the cheesecake?
Yes, the cakes hold up well to freezing within the cheesecake. Thaw slices in the refrigerator before serving.
How do you prevent cracks in a cheesecake?
Use room temperature ingredients, do not overmix, bake in a water bath, and allow the cheesecake to cool slowly in the oven.
Can I make this cheesecake ahead of time?
Absolutely! This Little Debbie Christmas Tree Cheesecake is perfect for making 1-2 days in advance; it actually tastes better after chilling.
What are other Little Debbie Cakes I can use?
You can try this recipe with Swiss Rolls, Fudge Rounds, or even the classic Zebra Cakes for a fun variation.


